I Was Featured Here, Buttons,Linky Party Schedule, Contact Me, About Me,Disclosure/Privacy.Holidays

Saturday, September 29, 2012

A Bouquet of Talent #4 & Best in Show Features

I hope everyone is having a wonderful weekend.  We have had a super rainy day, with even heavy rains predicted for tomorrow.  It's been a great day to finish up a few projects.  Mostly, I have taken care of cleaning my very neglected house today.  I try to keep a routine through the week of deep cleaning one room each night, but that just didn't happen this past week.  So today was catch up.

There were so many great projects last week.  Thank you so much for sharing your amazing talent.  Please grab the  featured button.


<a href="http://lifeonlakshoredrive.blogspot.com/" title="Life on Lakeshore Drive"><img alt="Life on Lakeshore Drive" src="http://i1154.photobucket.com/albums/p527/kmoo63/BestinShowButton.jpg" style="border: none;" /></a>


 A Pile of Scrap created these adorable plates.


Lizzi's Creations shared her great burlap wreath and adorable pumpkins.


One More Time  shared a great tutorial for making these fabulous palm leaf pumpkins!


The Messy Roost shared her very creative, but oh so elegant pumpkins.


Sarah SaturDIY created this adorable pumpkin using wine corks.


At Home with Sweet T made this awesome personalized picture.  Such a great gift idea!


Tiaras and Bowties shared her adorable Halloween Countdown Blocks.


Fall Front Porch

House on the Way  has a beautifully decorated fall porch.


Organized Clutter Queen shared her adorable owl collection.


Fall Sunflower Topiary

Happy Saturday!  I hope everyone is having a wonderful weekend.  In my last post, I gave you a glimpse of my sunflower topiary!  I wanted to share with you how I gave a new look to an outdated topiary.  This one belonged to my grandmother, and I have had it sitting my closet since March.  

alt="diy sunflower topiary"

This was a super easy project that you can use to give a new look to a floral display you already have.  You can also buy the topiary forms to easily create one.  Here is what it looked like before I removed all the flowers and greenery.  

alt="diy sunflower topiary"

Last fall, I was at Cracker Barrel, and found these little sunflower bundles on clearance for $3.00 each.  So of course, I had to buy all they had left.  I'm so glad that I did.  I have used these flowers in so much in my fall decor.  When you see a great deal, you better grab it.  :)

alt="diy sunflower topiary"

This one already has a few flowers missing.  After removing all the flowers, I painted the stem and the base in Martha Stewart's Cast Bronze.  

rel="nofollow"

rel="nofollow"

I love this color.  I have used it so much.  It has a beautiful finish.

Here is a top view of the topiary.  

alt="diy sunflower topiary"

I couldn't believe that the sunflowers actually fit perfect on the topiary stems, which made this a super easy project!  Instead of adding more flowers to the base, I just used fall leaves, and added one sunflower.  I also tied some raffia to the top and stuck a few leaves and berries in the stem.  

alt="diy sunflower topiary"

Here it is in the corner of my kitchen.  

alt="diy sunflower topiary"


It added lots of color to that little corner spot. 

I also used one of the sunflowers in my mini cupcake stand that I bought at Hobby Lobby.  I can't seem  to pass those things up.   I love them.  They are so fun to decorate with.

alt="decorating with mini cupcake stand"

I attached floral wire so it would stand up.  

alt="making flower stand up with wire"

It fits perfectly and really stands out inside the glass. 

alt="fall decor"

  Instead of throwing those outdated flower arrangements away, just give them a face lift.  When you see a great deal on flowers, buy them!!  You can always find something to do with them.  


Have a great weekend!  Thanks so much for visiting, sweet friends. I am so thankful for you!

Kathy

Linking to:  It's Fall Y'all

Sunday, September 23, 2012

Pumpkin Glitz & Glitter

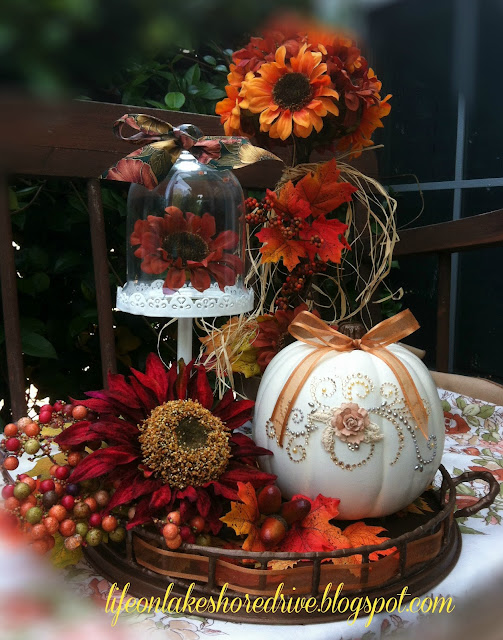
Are you looking for a quick, easy way to give your pumpkins a little glitz?  I was at Hobby Lobby this week, and saw these beautiful crystal appliques used for scrapbooking.  I couldn't pass them up, because I've been trying to decide how to decorate my white fake pumpkin that I also bought at Hobby Lobby.  

Pumpkin glitter and glitz decorate pumpkin with rhinestone appliques

It was so quick and easy to do.  You just have to be very careful removing the decal from the paper.  Very slow and easy does the trick. 

Pumpkin glitter and glitz decorate pumpkin with rhinestone appliques


Because I wasn't crazy about the stem on this pumpkin, I painted it a darker brown and added the bow.

fall vignette pumpkin fall flowers cloche

I love it!  I just wish all of my projects were that quick and easy.  

fall vignette pumpkin fall flowers cloche

They also had these cute little owls. There was two in a package.  So I added one to a very small pumpkin.

decorate pumpkins for fall with owl applique

How cute is that?

decorate pumpkins for fall with owl applique

I put the second one on the outside of a cloche cover.  I love how it looks when the candle is on.

decorate cloches for fall with owl


Have you been doing any fall decorating this week?  I have so much more fall decor to share with you!  Last week was crazy busy, but I'm working on getting all my posts done.  Have a wonderful week!  


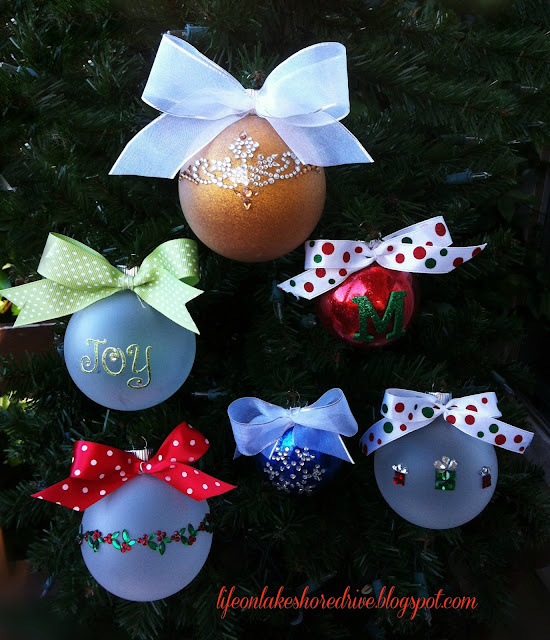
Here's another fun way to use scrapbooking appliques for Christmas!

DIY Christmas ornament tutorial diy Christmas ornaments, scrapbooking appliques   Life on Lakeshore Drive


diy Christmas ornaments, scrapbooking appliques   Life on Lakeshore Drive


Kathy


A Bouquet of Talent Sunday Linky Party #3

Best in Show Features #2

I am so thankful to have you wonderful bloggers share at A Bouquet of Talent Linky Party again this week.  I can't tell you how much I appreciate you sharing your talent here.  Once again there were some amazing projects.  This time I am getting the features out before the new party!  :) 

Before we begin, I want to give a huge thank you to my sweet friend, Doreen at HouseHoneys for nominating me for the   Illuminating Blogger Award.  I am so honored to receive this award! 


It's time for those weekly features. I love hosting the linky party, but the hardest part is choosing from all the great projects!  Please feel free to grab a button if you were featured!


Sunday, September 16, 2012

Best in Show Features from Bouquet of Talent #1

I can't believe it's already time for another Bouquet of Talent Linky Party!  I thank you so much dear friends for linking up and making my first party special.  You are the reason I named it Bouquet of Talent!  Your talent and creativity is amazing.  You made it really difficult to choose the features.   I look forward to seeing what your talented selves have created this week.


fabric rosette tree

Nici' at Posed Perfection made this adorable fabric rosette tree.  It's perfect for fall. 

diy wall art

Doreen at HouseHoneys did a fabulous job painting this beautiful wall art.

coffee cup lamp

I adore this cute coffee cup lamp that Cecilia at The B Farm created.

diy table clock

Suzy at Simply Vintagous has a fabulous table with a great tutorial.

diy frosted vase

Jana at Transformations from the Heart shared her beautiful DIY frosted vase.

diy wall art

Erin at Chronic Christian Crafter got creative and made this wedding lyric canvas.

fall tree decor

Debbie at Debbie-Dabble shared her awesome fall tree and decor.  Love this tree.

fall beaded decor

Gail at Purple Hues and Me made these gorgeous fall beaded decor. 

vintage-coffee-pot-wind-chimes

How cute is this??  I love Tuula's from The Thrifty Rebel coffee pot windchimes.  So creative.

No party is complete without food!  Check out these great recipes.

jalapeno poppers

Sara at Milwaukee Kitchens shared her Fresh Jalapeno Poppers!  They look so yummy.

pumpkin spice cheesecake

Stephanie at Sweet Boutique shared this delicious Pumpkin Spice Cheesecake!

90 minute party platter

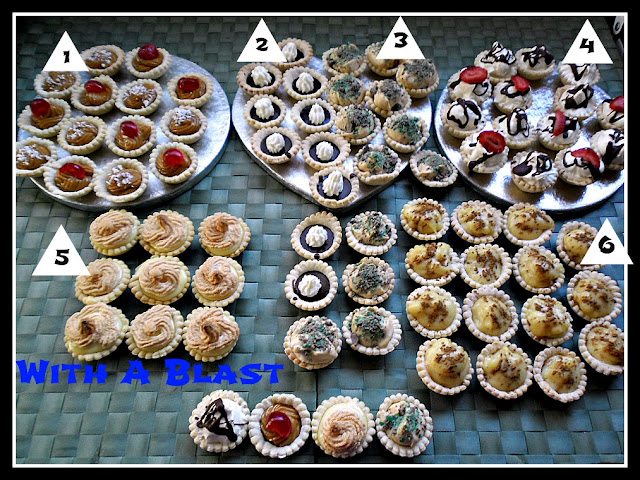
Linda at With a Blast shared her great 90 Minute Party Platter.

pumpkin spice muffins

Natasha in Oz shared her yummy Pumpkin Spice Muffins!  I can't wait to try these.


Thank you so much for linking up and sharing your great projects and recipes with us.  Please grab a button if you were featured!  I think it is finally working!  Let me know if you have trouble with it.

blog button best in show

<a href="http://lifeonlakshoredrive.blogspot.com/" title="Life on Lakeshore Drive"><img alt="Life on Lakeshore Drive" src="http://i1154.photobucket.com/albums/p527/kmoo63/BestinShowButton.jpg" style="border: none;" /></a>

A Bouquet of Talent Linky Party #2  is up and running!  I can't wait to see what you've been up to this week.

Kathy

A Bouquet of Talent Linky Party #2

Saturday, September 15, 2012

Fall Burlap Wreath Tutorial

I finally finished my fall wreath that I have been planning to do for weeks now.  I bought a roll of burlap back in the summer with intentions of getting a head start on my fall decorating, but that didn't happen.  I have seen so many beautiful burlap wreaths on Pinterest, and I wanted to add one to my fall decor.  

alt="Fall Burlap wreath tutorial"


Here is the roll of burlap that I purchased at Michael's.  

burlap roll for wreath

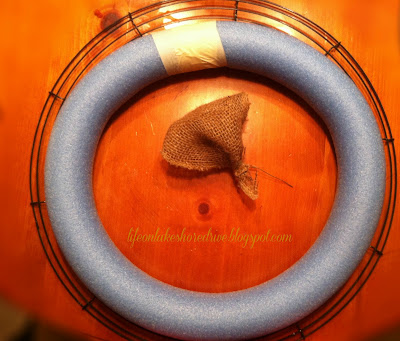
I planned to use a metal wreath frame, but wasn't loving the way the burlap looked on it.  I still had 2 pool noodles that I had also purchased during the summer.  So I decided to use that.  I taped the noodle together and wrapped it with brown tissue paper, because I didn't want the blue to show through.

alt="Fall Burlap wreath using pool noodle tutorial"

The next step was wrap with burlap.  After wrapping with burlap, it was smaller than I wanted it.  I decided to go with a puffy wreath to make it larger.

alt="Fall Burlap wreath tutorial"

I cut strips of burlap about about the width of the inside of the wreath.

alt="Fall Burlap wreath tutorial"

.  Next, I folded the ends together and wrapped with floral wire. 

alt="Fall Burlap wreath tutorial"

I didn't take a picture of the next step, but I simply wrapped heavy floral wire twice around the end of each piece.  I left about 2 inches sticking out and stuck it in the foam.  You can see from the photo below, how much larger it made the wreath.  I also stuck a piece of ribbon in there to see if I liked it.  :)

alt="Fall Burlap wreath tutorial"

The photo below is kind of scary looking, but I wanted to make sure I had my burlap flowers evenly placed around the wreath.  Sorry the photos were taken inside, but I had to finish this last night.  

alt="Fall Burlap wreath tutorial"

Once I had the burlap "flowers" placed on the way I liked them, I filled in the outside edges with burlap.  The photo below shows the outside filled in.  I also took a few straight pins and pinned down the rough edges of the burlap to give it a smoother look.  

alt="Fall Burlap wreath tutorial"

Here's a quick little tip.....if you are trying to decide if you want to use rosettes or flowers, toilet tissue makes super fast, beautiful rosettes!  :)  I quickly made these and stuck them on the wreath to see if I wanted to use rosettes.  I do love the white flowers with the burlap, so when spring rolls around all I have to do is change the flowers.  Well, make real fabric rosettes that is! 

alt="Fall Burlap wreath tutorial"

Here is the wreath after I decided to use fall flowers instead of rosettes.  This morning I took this photo, but decided it still needed some color.  

alt="Fall Burlap wreath tutorial"

Here is the finished wreath.  I weaved some dark red ribbon through the wreath and stuck a few pieces of fall ribbon in the wreath.  I also moved my berry spray to the top.  

alt="Fall Burlap wreath tutorial"

This was a super easy wreath to make, but this burlap is sure rough on the fingers.  It would be better to spread it over a few days instead of one night.  I just pinned my flowers on the wreath, so it can be changed seasonally.

I thank you so much for stopping by for a visit.  I always love hearing from you!  Happy Fall, y'all!!

                                                                           Kathy
Linking to :   It's Fall Y'all  Sew Can Do Fall Party